1. Navigate to your workstation. In this lab, it will be a freshly deployed Windows 10 Virtual Machine on Esxi
2. To rename the device click start and search for “pc name”

3. To rename the device click start and search for “pc name”
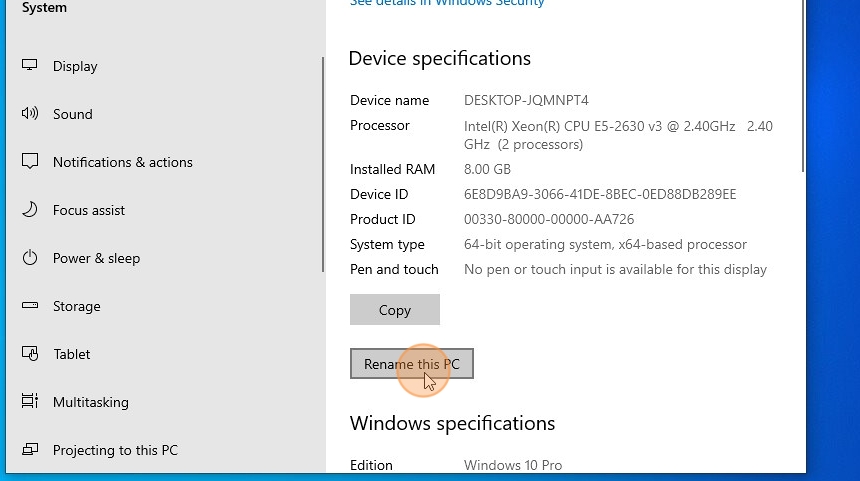
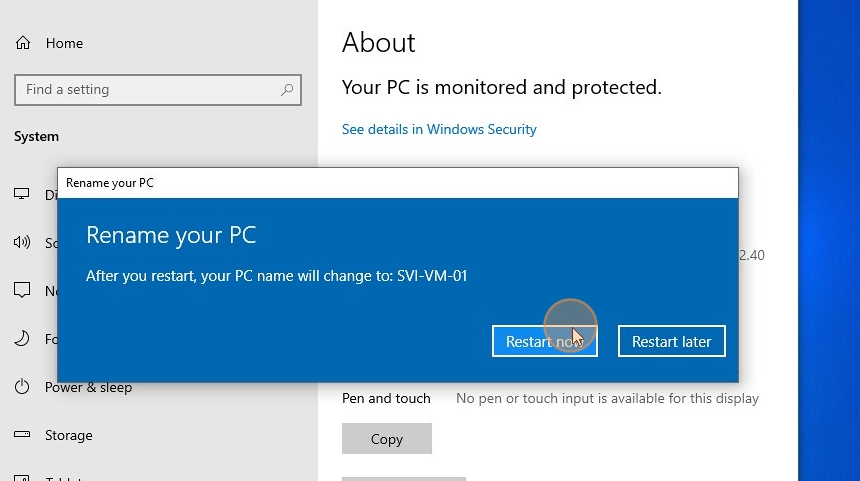
4. Enter the PC name

5. Restart the VM
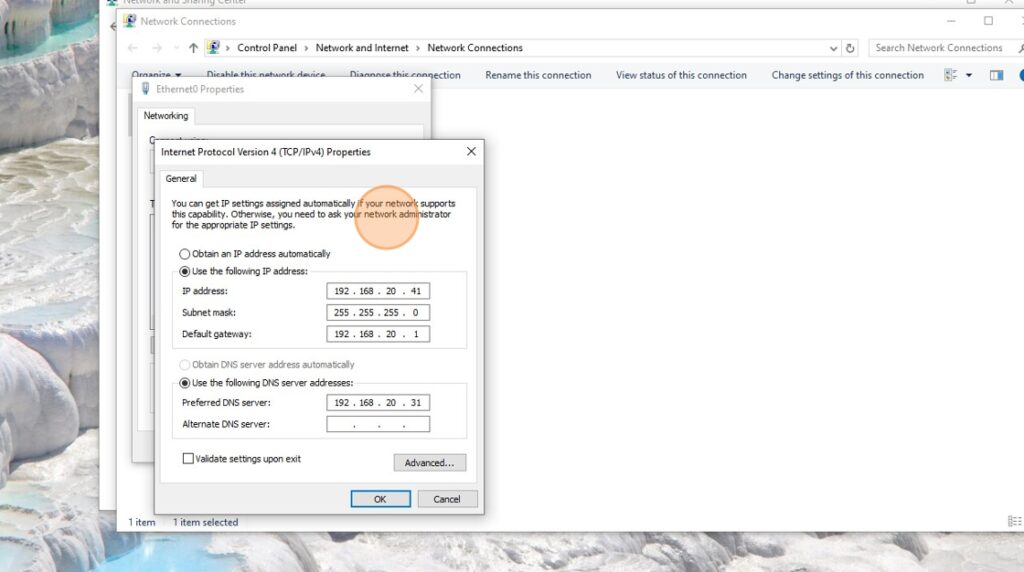
6. Log back into the VM, go to network adapter settings, IPv4 settings and set up a static IP address. The Domain Controller IP address is 192.168.20.31 so we will set up one in the same range and set IP to 192.168.20.41
The Default Gateway is the IP adress of the router which is 192.168.20.1
The DNS server should point to the Domain Controller’s IP address
When done, click ok and save
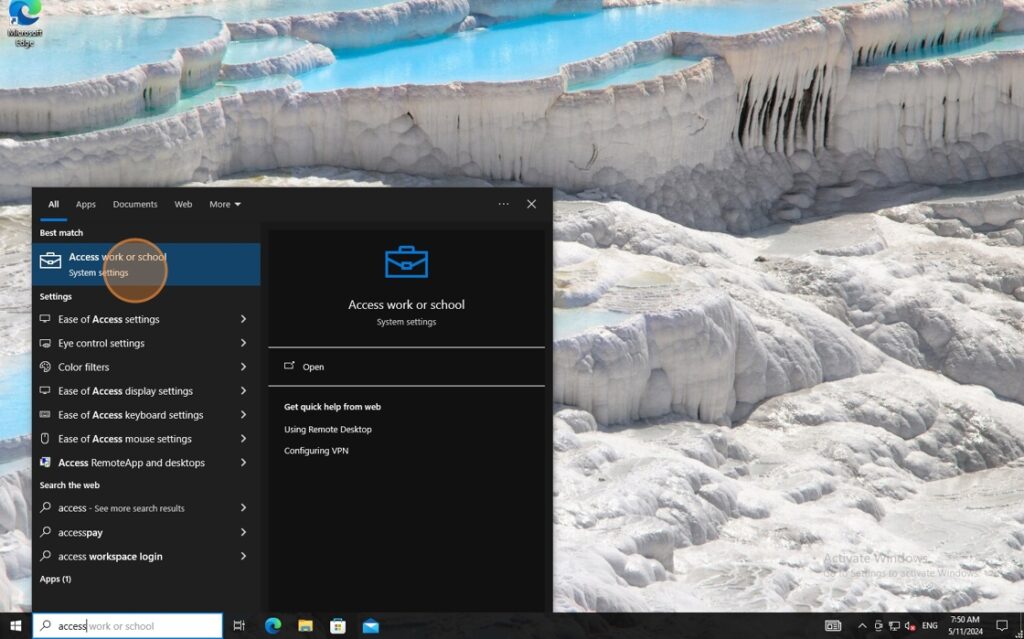
7. Search for “Access work or school”
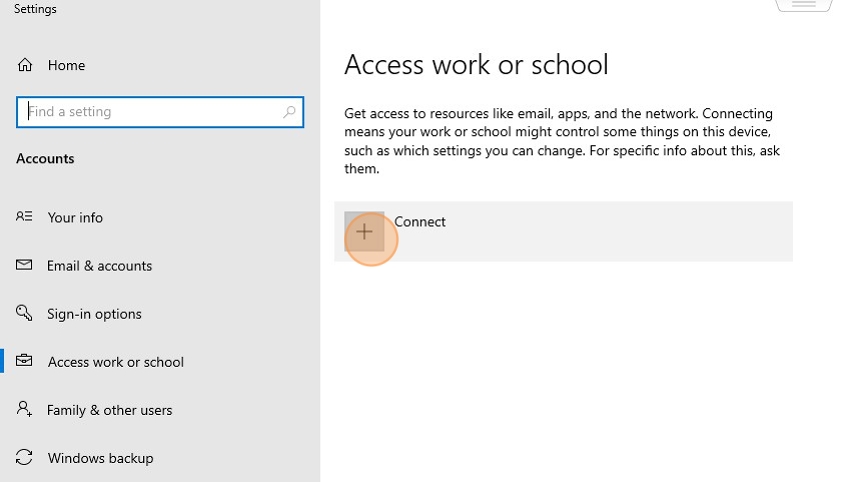
8. Click “Connect”
9. Select “Join this device to a local Active Directory”

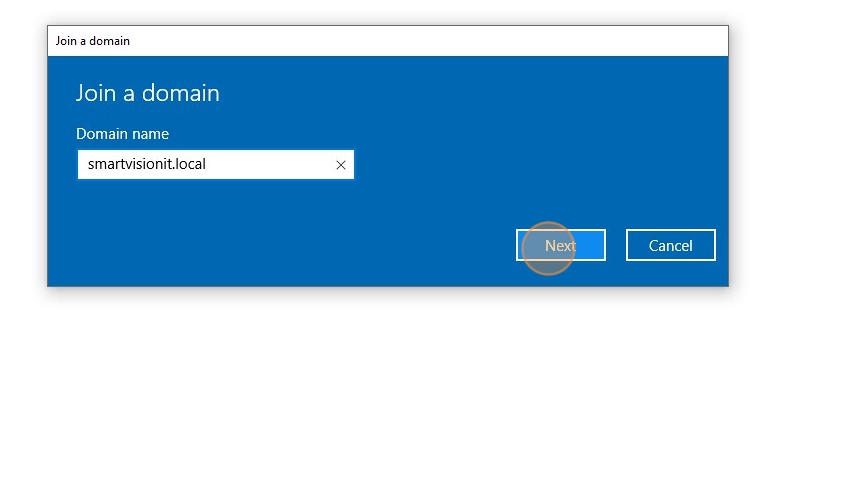
10. Type the domain name and click next
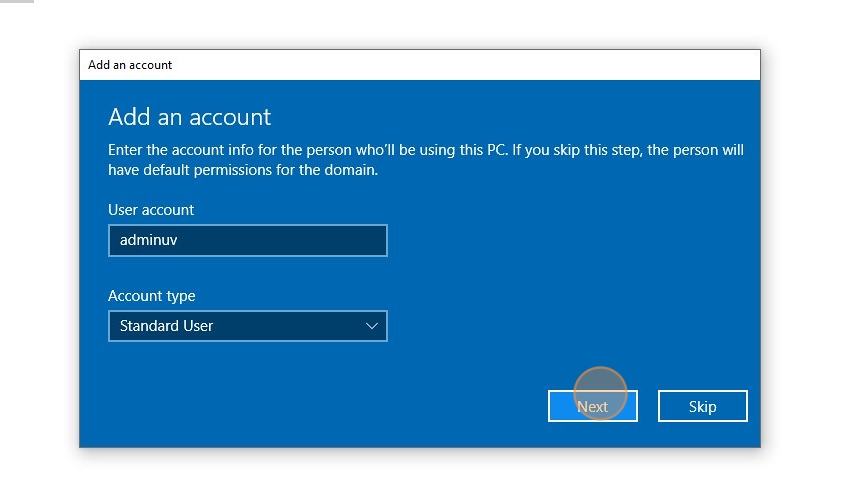
11. Enter the name of the admin account we created on SVI-DC-01 on the previous tutorial. Click next
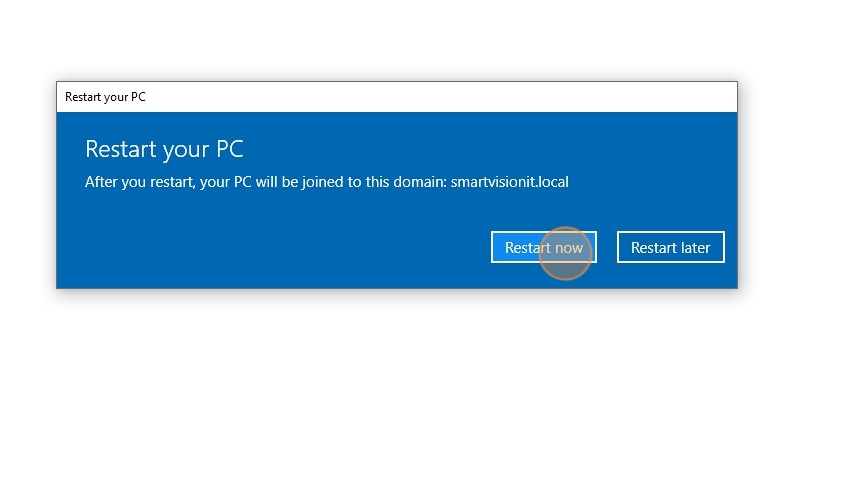
12. Click “Restart now”
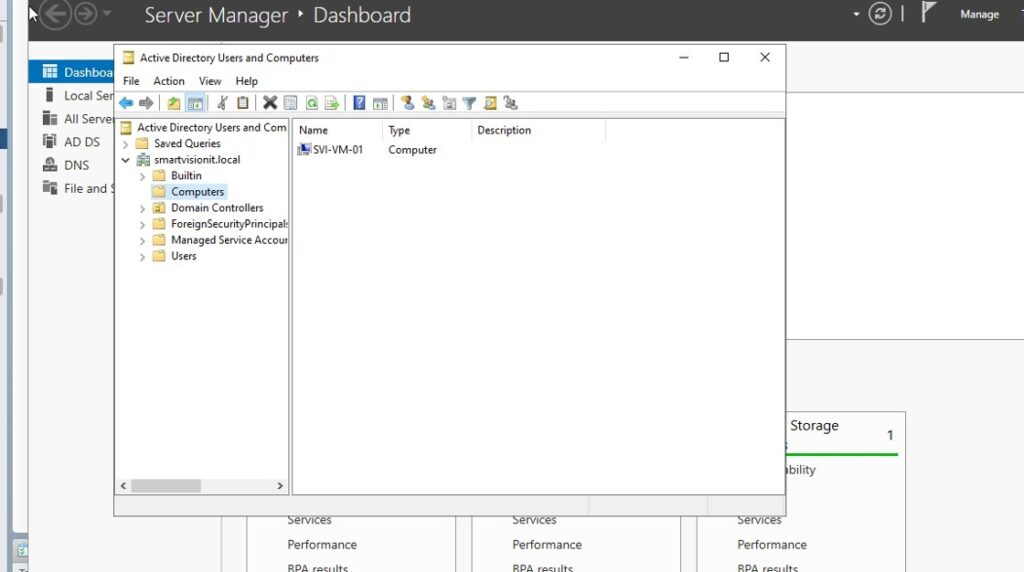
13. Switch to the Domain Controller, Open Active Directory Users and Computers and expand the Computers OU under the directory. You should now see SVI-VM-01 we created under computers which means it had successfully joined the domain